Dynamic Salesforce Lightning Contact Search application in 10 minutes
In this post, lets use the Lightning Components to build an application called ContactsFinder. The application provides quick access to your Salesforce Contacts within your org. The Lightning Application uses three Lightning Components: SearchBar, ContactList, and ContactDetails. These components communicate using Lightning events.
Note: We assume that you have the developer org which is lightning ready. This exercise also uses Bootstrap as a static resource.
Here is quick process to upload Bootstrap as a Static Resource in case you do not have it set-up:
-
Download and unzip the Salesforce Foundation Bootstrap here
-
In Salesforce, click Setup > Build > Develop > Static Resources
-
Click New
-
Specify bootstrap as the Name, then click the Choose File button, and select the bootstrap.css in the dist/css directory of the unzipped bootstrap folder
-
Click Save
Lets get started by creating an Apex controller on Contact that handles all the server side duties of Lightning Component. In Salesforce, click your name in the upper right corner of the screen. In the dropdown menu, click Developer Console. 1) In the Developer Console, click File > New > Apex Class. Specify ContactController as the class name and click OK.
2) Implement the class as follows:
public with sharing class ContactController {

    @AuraEnabled
    public static List<Contact> findAll() {
        return [SELECT id, name, phone FROM Contact LIMIT 50];
    }

    @AuraEnabled
    public static List<Contact> findByName(String searchKey) {
        String name = '%' + searchKey + '%';
        return [SELECT id, name, phone FROM Contact WHERE name LIKE :name LIMIT 50];
    }

    @AuraEnabled
    public static Contact findById(String contactId) {
        return [SELECT id, name, title, phone, mobilephone, Account.Name
                    FROM Contact WHERE Id = :contactId];
    }

}
ContactController is a regular controller class with methods to retrieve contacts (findAll), or to search contacts by name (findByName) or by id (findById). The @AuraEnabled method annotation makes a method available to Lightning applications
3) Click File > Save to save the file
Now that we are all set with the Apex Controller lets get our hands dirty with the Lightning components.
Lets start by creating an lightning app that acts as a container to our Lightning components.
1) In the Developer Console, click File > New > Lightning Application. Specify QuickContacts as the bundle name and click Submit
2) Implement the application as follows:
Steps
-
In the Developer Console, click File > New > Lightning Application. Specify QuickContacts as the bundle name and click Submit
-
Implement the application as follows:
<aura:application>
<link href='/resource/bootstrap' rel="stylesheet"/>
<div class="navbar navbar-default navbar-static-top" role="navigation">
<div class="container">
<div class="navbar-header">
<a href="#" class="navbar-brand">Lightning Contacts</a>
</div>
</div>
</div>
<div class="container">
<div class="row">
<div class="col-sm-12">
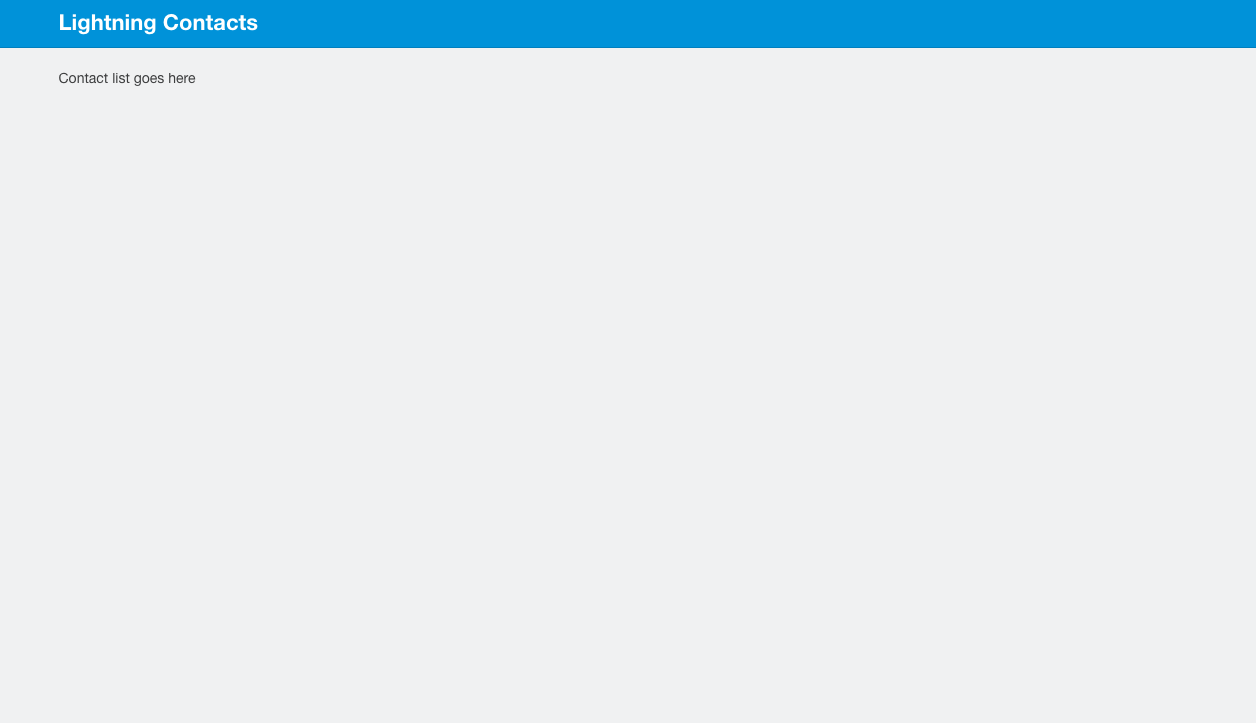
Contact list goes here
</div>
</div>
</div>
</aura:application>
-> The link tag references the bootstrap style sheet uploaded as a static resource in your org i.e. dist/css -> The application uses Bootstrap to implement a basic layout for the application -> Lightning applications can include Lightning components and regular HTML markup
1) Click File > Save to save the file
2) Click Preview (upper right corner)
3) Preview the application in the browser
Now that we have our App container ready lets go and have fun making Lightning components. Encapsulation is core of Lightning framework. So below are the three components we need to achieve our functionality. 1) ContactList 2) SearchBar 3) ContactDetails
Lets start by creating the ContactList component that displays contacts in our app.
-
In the Developer Console, click File > New > Lightning Component. Specify ContactList as the bundle name and click Submit
-
Implement the component as follows:
    <aura:component controller="ContactController">

        <aura:attribute name="contacts" type="Contact[]"/>
        <aura:handler name="init" value="{!this}" action="{!c.doInit}" />

        <ul class="list-group">
            <aura:iteration items="{!v.contacts}" var="contact">
                <li class="list-group-item">
                    <a href="{! '#contact/' + contact.Id }">
                        <p>{!contact.Name}</p>
                        <p>{!contact.Phone}</p>
                    </a>
                </li>
            </aura:iteration>
        </ul>

    </aura:component>
-> The controller assigned to the component (first line of code) refers to the server-side controller (ContactController) we already created.
-> The contacts attribute is defined to hold the list of Contact objects returned from the server.
-> The init handler is defined to execute some code when the component is initialized. That code (doInit) is defined in the component’s
client-side controller (you’ll implement the controller in the next step).
<aura:iteration> is used to iterate through the list of contacts and create an <li> for each contact
The <a href="{! '#contact/' + contact.Id }"> anchor tag around the contact data is defined to set the page hashtag to #contact/ followed by the contact id.
In next few steps ContactDetails component also will use that hashtag to display details information every time the user clicks a new contact.
- Click File > Save to save the file.
Now lets implement the Controller by adding few lines of Javscript mentioned below:
1) Click CONTROLLER on the right hand side.
2) Implement the Controller as follows:
    ({
        doInit : function(component, event) {
            var action = component.get("c.findAll");
            action.setCallback(this, function(a) {
                component.set("v.contacts", a.getReturnValue());
            });
            $A.enqueueAction(action);
        }
    })
-> The controller has a single function called doInit. This is the function the component calls when it is initialized. -> You first get a reference to the findAll() method in the component’s server-side controller (ContactController), and store it in the action variable. -> Since the call to the server’s findAll() method is asynchronous, you then register a callback function that is executed when the call returns. In the callback function, you simply assign the list of contacts to the component’s contacts attribute. -> $A.enqueueAction(action) sends queue of asynchronous server calls. That queue is an optimization feature of Lightning.
3) Click File > Save to save the file
Inorder to preview the component we need to add the component to our main QuickContacts application as shown below:
    <div class="container">
        <div class="row">
            <div class="col-sm-12">
                <yournamespace:ContactList/>
            </div>
        </div>
    </div>
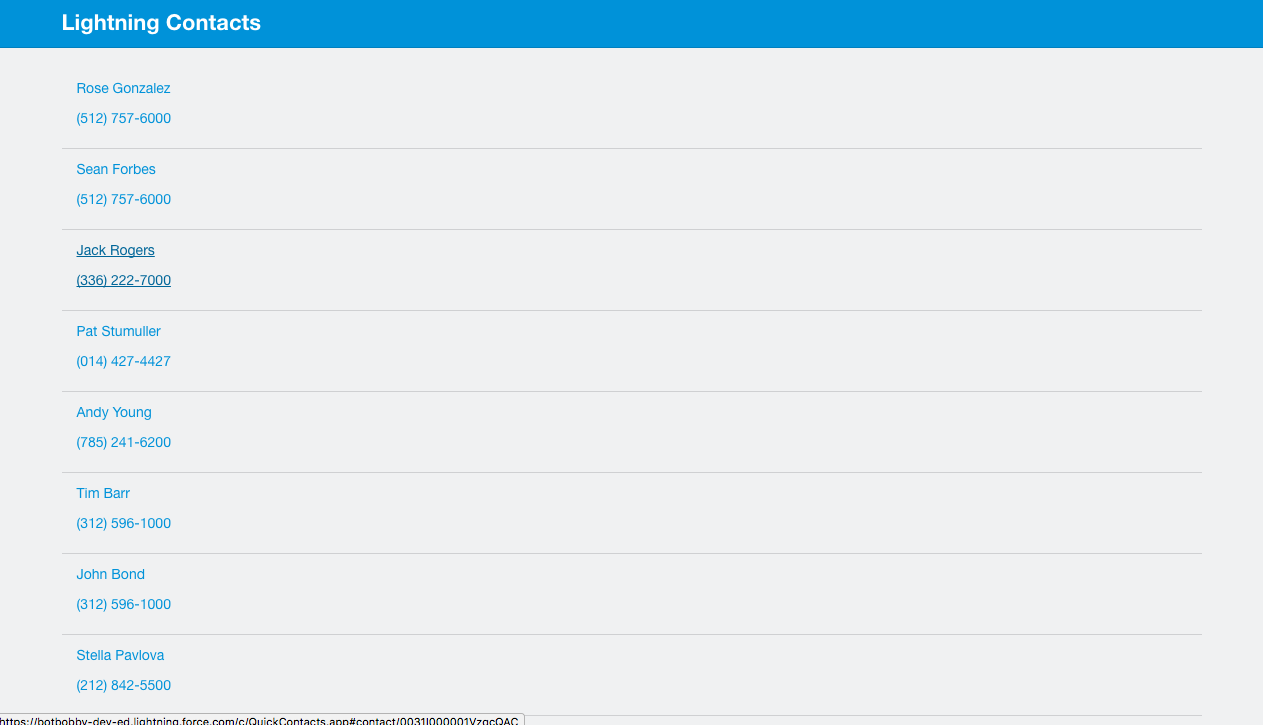
1) Click File > Save to save the file
2) Click Preview or Update Preview
3) Preview the application in your browser
Now moving on to our next component we need to develop a search bar component using Lightning Events to notify other components when the search key changes. Let’s start by creating a searchKeyChange event int he Developer Console: 1) Dev Console > File > New > Lightning Event. Specify SearchKeyChange as name and click Submit 2) Add the below code to your event.
    <aura:event type="APPLICATION">
        <aura:attribute name="searchKey" type="String"/>
    </aura:event>
-> The event holds one argument: the new searchKey
3) Click File > Save to save the file
Now lets create the actual ###SearchBar component 1) In the Developer Console, click File > New > Lightning Component. Specify SearchBar as the bundle name and click Submit
2) Add the below lines of code:
    <aura:component>

        <input type="text" class="form-control" onkeyup="{!c.searchKeyChange}"
                placeholder="Search"/>

    </aura:component>
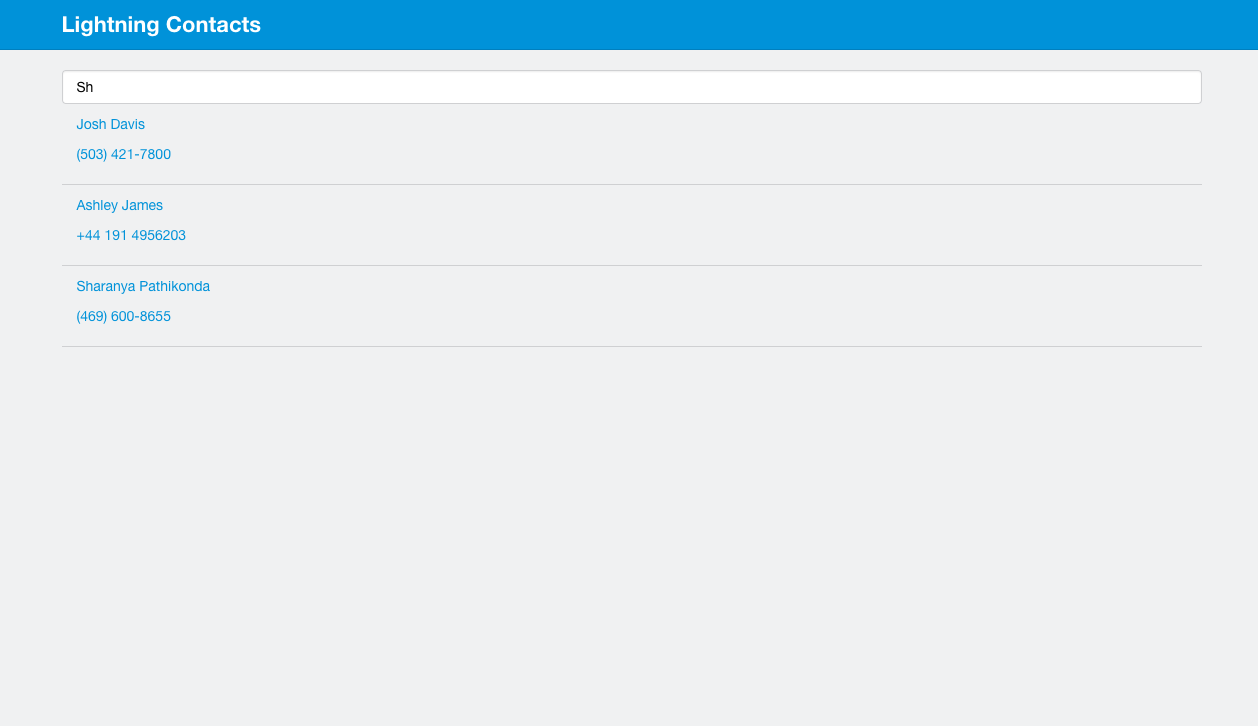
-> This is a simple component with a single input field. -> When the user types in a character (onkeyup), the searchKeyChange() function is executed in the component’s client-side controller. Using this approach the search is refined every time the user types in a character. 3) Click File > Save to save the file
Now lets add some js code to enable the controller for the SearchBar component.
Add the below lines of the code:
    ({
        searchKeyChange: function(component, event, helper) {
            var myEvent = $A.get("e.SearchKeyChange");
            myEvent.setParams({"searchKey": event.target.value});
            myEvent.fire();
        }
    })
-> The function first gets an instance of the SearchKeyChange event -> It then sets the event’s searchKey parameter to the input field’s new value -> Finally, it fires the event so that registered listeners can catch it
Click File > Save to save the file
Now lets set-up the ContactList component to litsen to the event change by adding an event handler for the SearchKeyChange event (right after the init handler):
<aura:handler event="SearchKeyChange" action="{!c.searchKeyChange}"/>
-> The handler is set up to execute the searchKeyChange() function in the controller -> You first get the value of the new searchKey available in the event object. -> You then invoke the findByName() method in the Apex controller. -> When the asynchronous call returns, you assign the list of contacts returned by findByName() to the component’s contacts attribute.
Before we add the search component to our app let’s add the SearchKeyChange Js code to our ContactList controller
    searchKeyChange: function(component, event) {
        var searchKey = event.getParam("searchKey");
        var action = component.get("c.findByName");
        action.setParams({
          "searchKey": searchKey
        });
        action.setCallback(this, function(a) {
        	component.set("v.contacts", a.getReturnValue());
        });
        $A.enqueueAction(action);
    }
Now lets develop our last component that display the details of the contact.
1) In the Developer Console, click File > New > Lightning Component. Specify ContactDetails as the bundle name and click Submit
2) Implement the component as follows:
    <aura:component controller="ContactController">

        <aura:attribute name="contact" type="Contact" default="{'sobjectType': 'Contact'}"/>
        <aura:handler event="aura:locationChange" action="{!c.locationChange}"/>

        <div class="details">
            <h1>{!v.contact.Name}</h1>
            <h3>{!v.contact.Account.Name}</h3>
            <h3>{!v.contact.Title}</h3>
            <p>{!v.contact.Phone}</p>
            {!v.contact.MobilePhone}
        </div>

    </aura:component>
-> The controller assigned to the component refers to the server-side controller (ContactController).
-> The contact attribute is defined to hold the displayed Contact.
-> In the ContactList , you wrapped each contact in the list with a <a href="{! '#contact/' + contact.Id }"> anchor tag that sets the page hashtag to #contact/ followed by the contact id of the clicked contact.
In this component, the locationChange handler is defined to listen to hashtag changes, and execute the controller’s locationChange() when it happens. The locationChange() function implemented in the next step retrieves and displays the selected contact. Add the below js lines of code to controller.
    ({
        locationChange : function(component, event, helper) {
            var token = event.getParam("token");
            if (token.indexOf('contact/') === 0) {
                var contactId = token.substr(token.indexOf('/') + 1);
                var action = component.get("c.findById");
                action.setParams({
                  "contactId": contactId
                });
                action.setCallback(this, function(a) {
                    component.set("v.contact", a.getReturnValue());
                });
                $A.enqueueAction(action);
            }
        }
    })
-> The function first gets the new value of the hashtag available in the event object. -> It then parses the hashtag to extract the contact id and invokes the findById() method in our Apex controller. -> When the asynchronous call returns, it assigns the contact returned by findById() to the component’s contact attribute
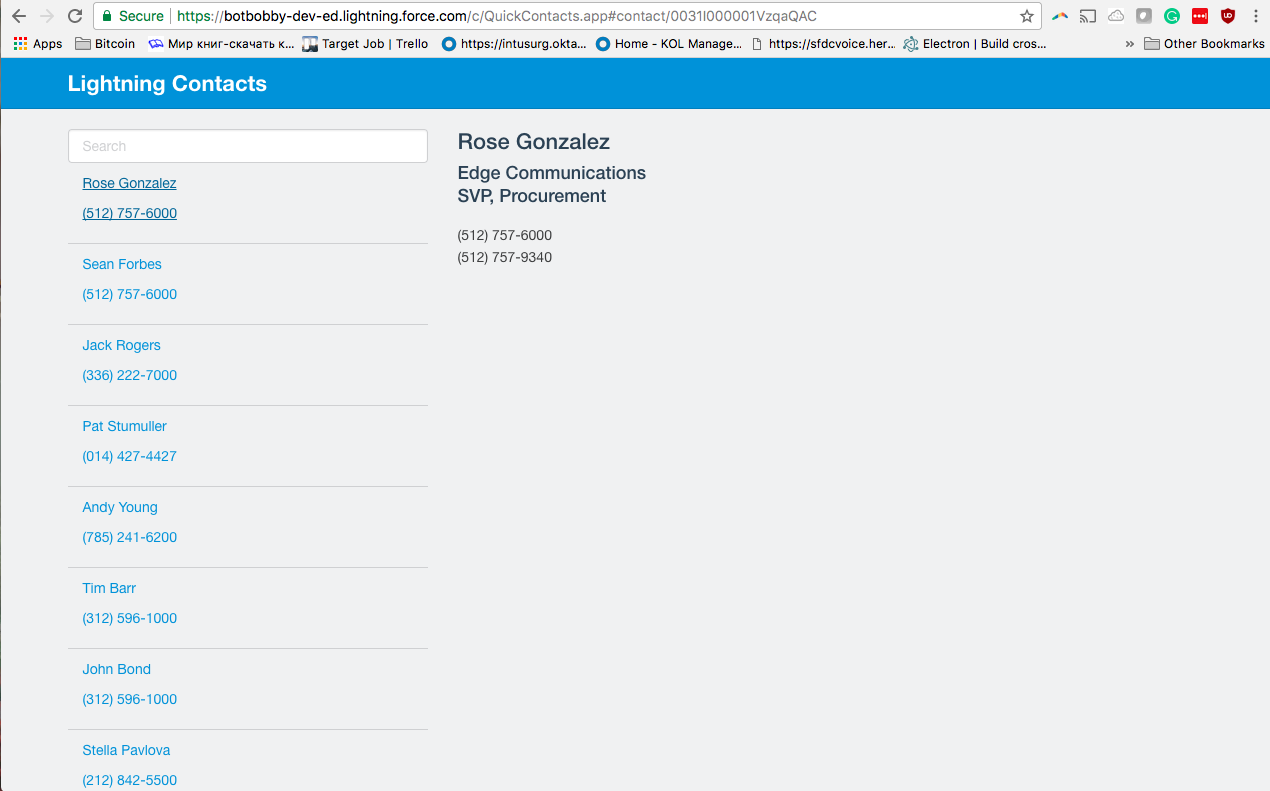
Now lets add all our components to our application as shown below:
    <div class="container">
        <div class="row">
            <div class="col-sm-4">
                <c:SearchBar/>
                <c:ContactList/>
            </div>
            <div class="col-sm-8">
                <c:ContactDetails/>
            </div>
        </div>
    </div>
Thanks to Christophe Coenraets. Lightning Getting Started on GitHub.
Keywords: #SFDCBrewery #SriharideepKolagani #SalesforceDX #SalesforceDevelopment #Salesforce #SFDCBrewery #Brewery #SalesforceOnlineTraining #SalesforceTutorials #SalesforceCertification