Docker X Heroku - Deploy and run docker apps in Heroku in 15 min
Docker is a flexible ,lightweight, interchangeable, portable, scalable and stackable platform for developers & sysadmins to develop, deploy, and run applications with containers. The use of Linux containers to deploy applications is called containerization. Containers are not new, but their use for easily deploying applications is.
Docker 101 - Basics of Docker
Images and containers A container is launched by running an image. An image is an executable package that includes everything needed to run an application–the code, a runtime, libraries, environment variables, and configuration files. A container is a runtime instance of an image–what the image becomes in memory when executed (that is, an image with state, or a user process). You can see a list of your running containers with the command, docker ps, just as you would in Linux.
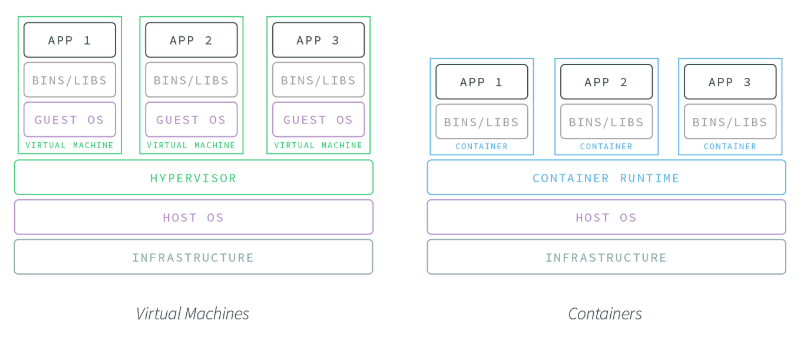
Containers and virtual machines
A container runs natively on Linux and shares the kernel of the host machine with other containers. It runs a discrete process, taking no more memory than any other executable, making it lightweight. By contrast, a virtual machine (VM) runs a full-blown “guest” operating system with virtual access to host resources through a hypervisor. In general, VMs provide an environment with more resources than most applications need.
Container Use Cases
Not all applications and organizations are going to have the same infrastructure requirements. The aforementioned benefits of containers make them particularly adept at addressing the following needs:
-
DEVOPS ORGANIZATIONS For teams working to practice ‘infrastructure as code’ and seeking to embrace the DevOps paradigm, containers offer unparalleled opportunities. Their portability, resistance to configuration drift, and quick boot time make containers an excellent tool for quickly and reproducibly testing different code environments, regardless of machine or location.
-
MICROSERVICE AND DISTRIBUTED ARCHITECTURES A common phrase in microservice development is “do one thing and do it well,” and this aligns tightly with application containers. Containers offer a great way to wrap microservices and isolate them from the wider application environment. This is very useful when wanting to update specific (micro-)services of an application suite without updating the whole application.
-
A/B TESTING Containers make it easy to roll out multiple versions of the same application. When coupled with incremental rollouts, containers can keep your application in a dynamic, responsive state to testing. Want to test a new performance feature? Spin up a new container, add some updates, route 1% of traffic to it, and collect user and performance feedback. As the changes stabilize and your team decides to apply it to the application at large, containers can make this transition smooth and efficient.
Lets get the game started by installing Docker from here. Test that your installation works by running the simple Docker image:
docker run hello-world

Unable to find image 'hello-world:latest' locally
latest: Pulling from library/hello-world
ca4f61b1923c: Pull complete
Digest: sha256:ca0eeb6fb05351dfc8759c20733c91def84cb8007aa89a5bf606bc8b315b9fc7
Status: Downloaded newer image for hello-world:latest

Hello from Docker!
This message shows that your installation appears to be working correctly.
...
A quick beginner cheat sheet to Docker:
## List Docker CLI commands
docker
docker container --help

## Display Docker version and info
docker --version
docker version
docker info

## Execute Docker image
docker run hello-world

## List Docker images
docker image ls

## List Docker containers (running, all, all in quiet mode)
docker container ls
docker container ls --all
docker container ls -aq
Docker 102 - Digging deeper into Docker concepts
It is important to understand the below three components to get a holistic picture of docker:
- Stack - It helps defining the interactions of all the services
- Service - It defines how containers behave in production.
- Container - As the name suggests this is where our app is going to live
For the sake of this blog, we are going to limit our exploration to building a container and deploying it to Heroku.
Creating Dockerfile
Dockerfile defines what goes on in the environment inside your container. Access to resources like networking interfaces and disk drives is virtualized inside this environment, which is isolated from the rest of your system, so you need to map ports to the outside world, and be specific about what files you want to “copy in” to that environment. However, after doing that, you can expect that the build of your app defined in this Dockerfile behaves exactly the same wherever it runs. For the purpose of the Docker project we are going to build using Node js, lets create a folder in my case I named it DockerXHeroku. Create an empty file Dockerfile and add the below code to prepare the container for our app.
FROM node:7
WORKDIR /app
COPY package.json /app
RUN npm install
COPY . /app
CMD node index.js
EXPOSE 8081
Now lets create a Node.js app First, create a new directory where all the files would live. In this directory create a package.json file that describes your app and its dependencies:
{
  "name": "DockerXHeroku",
  "version": "1.0.0",
  "description": "Node.js on Docker",
  "author": "Sri Kolagani <sfdcbrewery.github.io>",
  "main": "server.js",
  "scripts": {
    "start": "node server.js"
  },
  "dependencies": {
    "express": "^4.16.1"
  }
}
With your new package.json file, run npm install. If you are using npm version 5 or later, this will generate a package-lock.json file which will be copied to your Docker image. Then, create a index.js file that defines a web app using the Express.js framework:
//Load express module with `require` directive
var express = require('express')
var app = express()


//Define request response in root URL (/)
app.get('/', function (req, res) {
  res.send('SFDC Brewery Docker X Heroku\n')
})


//Launch listening server on port 8081
app.listen(8081, function () {
  console.log('app listening on port 8081!')
})
Create a .dockerignore file in the same directory as your Dockerfile with following content:
node_modules
npm-debug.log
This will prevent your local modules and debug logs from being copied onto your Docker image and possibly overwriting modules installed within your image.
Building your image
Go to the directory that has your Dockerfile and run the following command to build the Docker image. The -t flag lets you tag your image so it’s easier to find later using the docker images command:
docker build -t dockerxheroku .Your image will now be listed by Docker: 

Run the image
Running your image with -d runs the container in detached mode, leaving the container running in the background. The -p flag redirects a public port to a private port inside the container. Run the image you previously built:
$ docker run -p 8081:8081 dockerxheroku
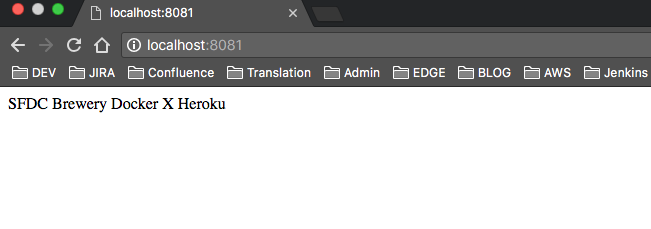
When it runs, you can access it in your localhost using the browser.

You can see the abbreviated container ID with
$docker container ls
You can stop the container using the following command:
docker container stop <CONTAINER_ID>
The information transmitted, including any content in this communication is confidential, is intended only for the use of the intended recipient and is the property of the Western Union Company or its affiliates and subsidiaries. If you are not the intended recipient, you are hereby notified that any use of the information contained in or transmitted with the communication or dissemination, distribution, or copying of this communication is strictly prohibited. If you have received this communication in error, please notify the Western Union sender immediately by replying to this message and delete the original message
Lets move the magic to Heroku
Every cloud provider is supporting Docker now, but I have to say, Heroku again proves the simplicity it offers to the developers. As always, it is as simple as a docker push. The only other service that is as simple is Hyper.sh, but Heroku has a few advantages like a built in load balancer, the ability to scale, many years of working out the kinks and hell yes its a Salesforce company.
This assumes you already have the Heroku CLI installed. Install the Heroku container registry plugin for the cli:
heroku plugins:install heroku-container-registry
Login to the registry:
$ heroku container:login
Now create a Heroku app:
heroku create ${YOUR_APP_NAME}
That command will return an app name, copy it to use it for the next command.
heroku container:push web --app ${YOUR_APP_NAME}
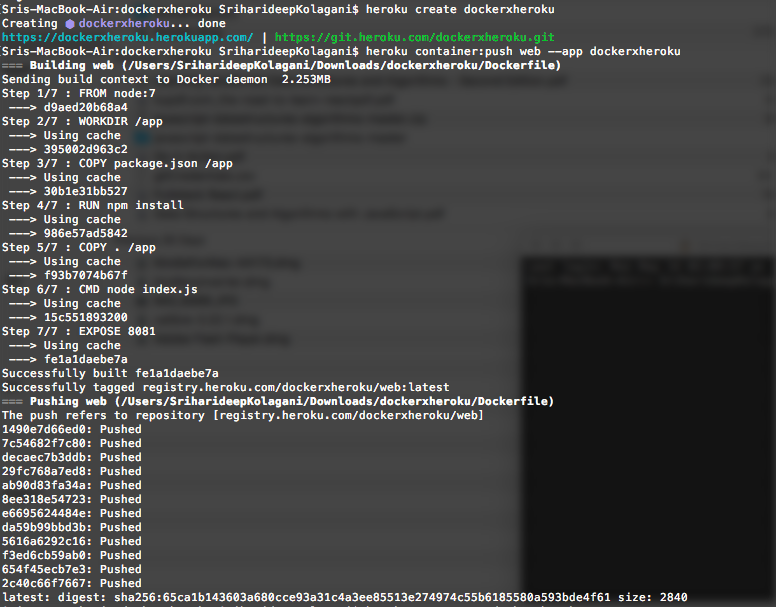
It will build your image and push it to Heroku. Check out your live app with:
heroku open --app ${YOUR_APP_NAME}
Push to Heroku with Docker only The following is good if you’re deploying to Heroku with your CI tool and/or don’t want to install the Heroku CLI.
You’ll need to get your Heroku token which you can get from the cli on any machine that’s logged into Heroku:
heroku auth:token
Grab the returned token and from this point on, you don’t need Heroku CLI anymore. Use the token to login to the Heroku Registry:
docker login --username=_ --password=${YOUR_TOKEN} registry.heroku.com
Note: The email and username are actually the underscore, don’t change those.
And then just push your image:
docker build -t registry.heroku.com/${YOUR_APP_NAME}/web .
docker push registry.heroku.com/${YOUR_APP_NAME}/web
Hurray! now go to Heroku app again and you’ll see it live.
Github repository is available here
Time to spin some containers, Happy Docking!
References: